Site Owners
Pilots
Download our app below to start discovering new landing sites


As a helicopter pilot, you know that weather can make or break a flight. While Helipaddy helps you map out your route with ease, pairing it with Windy’s powerful weather visualization takes your planning to the next level. In this guide, we’ll walk you through how to export a GPX file from Helipaddy, upload it to Windy via your computer or the cloud, and check the weather along your route—all in just a few steps.
Start by opening the Helipaddy app and finding your destination. Once you’ve opened the site card, hit the “Fly Here” button. This nifty feature generates your flight route in various formats but pick Skydemon to generate a GPX file. After it’s created, save the route as a GPX file. Helipaddy makes this export process seamless, giving you a file ready to use for further planning.
PS. For those that didn’t already realise, you can load this Helipaddy route file into SkyDemon, Foreflight, Garmin Pilot etc. You can also use these apps to generate the route GPX file, of course.
Windy’s mobile app doesn’t associate with GPX files (yet), so it is not offered as an app option in step 1 which is why we save it first. Instead of trying to open the file on your phone, save your exported GPX file to Google Drive or iCloud. This step ensures you can access it from your computer’s browser—key for the next part.
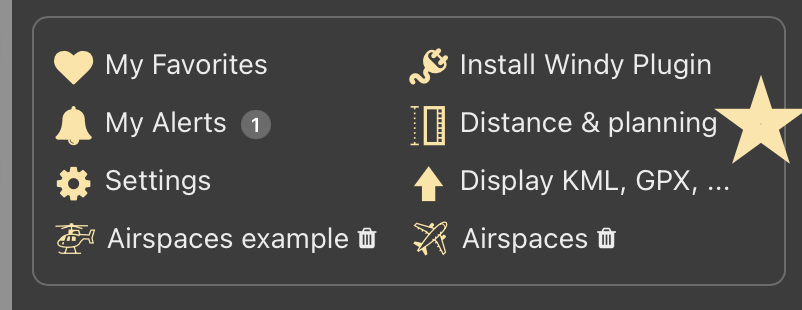
Head to windy.com on your computer (windy mobile does not accept GPX uploads). Once you’re there, click on the “Menu” hamburger symbol in the top right corner, then select “Distance and Planning.” This tool is Windy’s secret weapon for route-specific weather analysis.
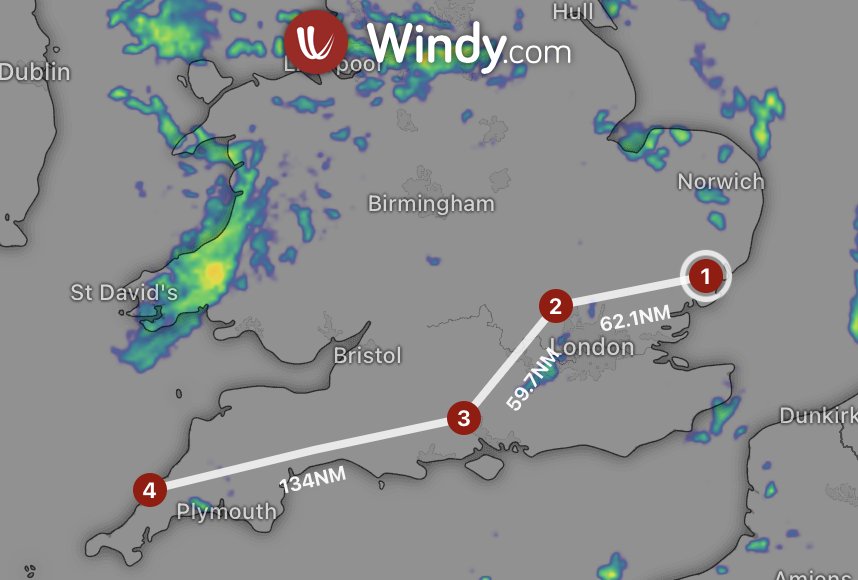
In the “Distance and Planning” section, you’ll see an option to drop or upload a file. Grab your GPX file from the cloud storage where you saved it, and either drag it into the box or click to upload. Windy will instantly plot your Helipaddy route on its interactive map, showing a vertical profile. Click this line to more points as you like:
Now the magic happens. Once your route is loaded, click the VFR option at the bottom, switch in the average speed switch and Windy lets you drag your departure time. It then overlays detailed weather forecasts—wind, precipitation, temperature, and more—along every leg of your journey. You’ll see how conditions evolve as you fly, helping you pick the safest and smoothest path.
Helipaddy’s “Fly Here” feature is perfect for quick route planning, but combining it with Windy’s weather tools gives you a full picture. Since Windy’s mobile app doesn’t yet handle GPX files directly, using the browser and cloud storage bridges the gap. It’s a small extra step for a big payoff in situational awareness.
Next time you’re prepping for a flight, give this a try. Export from Helipaddy, stash it in the cloud, and let Windy show you what’s ahead. Safe flying!


